
| Version 1 (modified by , 16 years ago) ( diff ) |
|---|
Step by Step
- Run Atlas and open up a map.
- Open the cinematic editor.
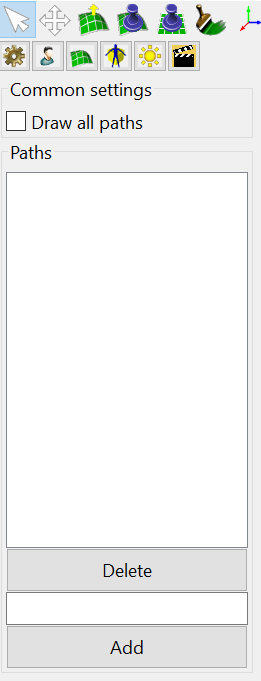
- Look at the interface, and study it a little.
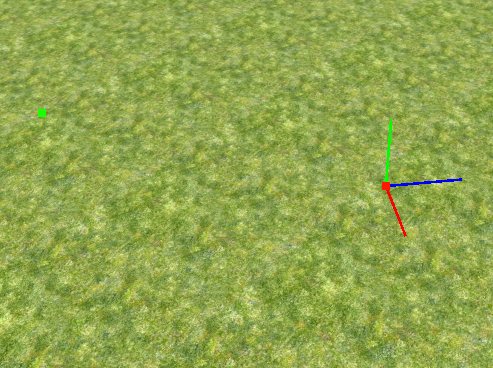
- Adding tracks: Put the camera in a position where you can see the sky and the terrain. The starting camera position should qualify for this. Rotate the camera to the orientation you would like it to start at, or leave it if you are happy how is. Now hit "add track." All this does is create a new track for the engine to work with, and saves the rotation of the camera. The track will start out pointing in this direction. Tip: it's generally also a good idea to move the camera to the actual position the track should start at because the same rotation at different positions can look suprisingly different. Note, however, that the position you move to is not saved when you hit "add track". It is saved later when you hit "add node."
- Adding paths: Now you have a track with a starting rotation. You need to add a path now. Each path has a rotation. When you hit "add path," the ending rotation for the path will be set to the camera's rotation. It's pretty difficult to set the rotation ahead of time, but if you want to estimate, rotate the camera to the desired orientation at the end of the track. This is very similar to adding a track. Only rotation is recorded, not position. Effect functions will eventually be explained later.
- Adding nodes: Time to give your track some shape. Move the camera to the position the track should start at. Hit "add node." This will add a node and record the position of it. This data, as well as the rotations of the track and path rotation can be fine tuned through the spin controls (the boxes with up and down arrows next to them). The box on the far right is the time value for each node. It represents how long it will take the camera to move from the previous node to this one. This is explained in better detail in the previous post post with the general information. (It might be in the cinematic editor thread). To enter a time value, type the number of seconds into the box and hit enter (max time = 100, with up to two digits to the right of the decimal). Continue adding nodes at the positions that the camera should follow (you shouldn't have to add that many nodes, probably 4-5 to to travel across the map horizontally with 1 second for time values, though experiment to find what works for you). All nodes on all paths must have a time value, excluding Node0 on all paths, which must not have a time value.
- Navigating/track play: Put it in motion! If all goes well, you can press play and it should smoothly play your track. The player buttons are pretty self-explanitory. However, the previous and next buttons operate per path, meaning that they have the same behavior as a player which plays audio, but it skips paths, not the entire track. The goto button on the bottom bar will bring you to a node's position (and will also rotate the camera correctly for that point). The timeline let's you move smoothly through the current track or path. Scrolling the top scroller will move you through the current path, and the bottom scroller will move you through the current track.
Changing the track
You will probably need to change the track's data at one point or another. This is easy. To do this, all you have to do is understand the buttons on the bottom bar. The add button will "add" an item, the "del" button will delete an item, and the mod button will change the currently selected item's data to the data of the current camera's position (for example, if you hit "mod node", it will change the selected node's position to the camera's position, or if you hit "mod path", it will change the selected path's rotation to the camera's rotation). For fine tuning, use the spin controls.
Track info
To change the name of the track, type it in the name box and hit enter. The timescale is a little less obvious. After putting in all that work and timing into your track, what happens if you realize you want everything to go slower or faster by a certain factor? Modifying the timescale does this. The maximum and minimum values are 5.00 and -5.00 respectively, with two digits to the right of the decimal. A value of 2 makes the track go twice as fast. A value of .25 makes the track go 4 times slower.
Getting fancy
The cinematic editor generates very smooth curves with the nodes you give it, with changing speed depending on the time and space between nodes. Thus, nodes which are farther apart or have a shorter time between them make the camera move faster (because it must go farther in a shorter amount of time), and vice versa. This makes accelerating and decelerating easy, as you can simply change the time of the node you want to change. However, there are some cases where this is not what you want. Maybe you need a consistent acceleration/deceleration and don't want to worry about calculating the time, or need it to grow by a constant factor. You could imitate this behavior yourself, but to be exact and save yourself time, use the ease/effect functions. Each path is given one of these.
These effects are made up of a mode and style. The mode determines how the speed will change. Ease in will accelerate, ease out will decelerate, ease-in-out will accelerate to a certain time t, then decelerate, and ease-out-in does the opposite. This doesn't do much by itself. You need a style which tells the mode how to change as time goes by. The default style is default. This means that the effect does nothing. The next is growth, which is usually the most practical. To use this, select it in the radio box, change the growth value in the growth box (sane range usually between 1-5, recommended: 2-3). Expo is set up the same, but its effect is more extreme in the way it accelerates/decelerates. Sine and circles are harder to describe, but if you want to know how they work, you can experiment in the editor, or just find a flash example of "easing equations" by Robert Penner, which illustrates the effect nicely. What about the ease-in-out? Well, it's almost the same, but you need to tell the editor when to step easing in and when to start easing out. Enter a value between 0...1 which will represent TimeElapsed/TotalDuration, so if you want it to be a fifty-fifty split, enter 0.5.
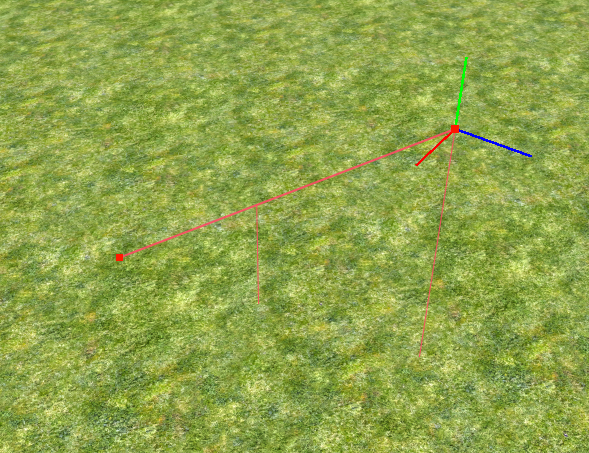
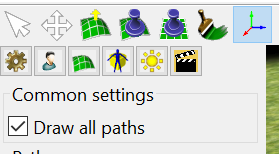
Display
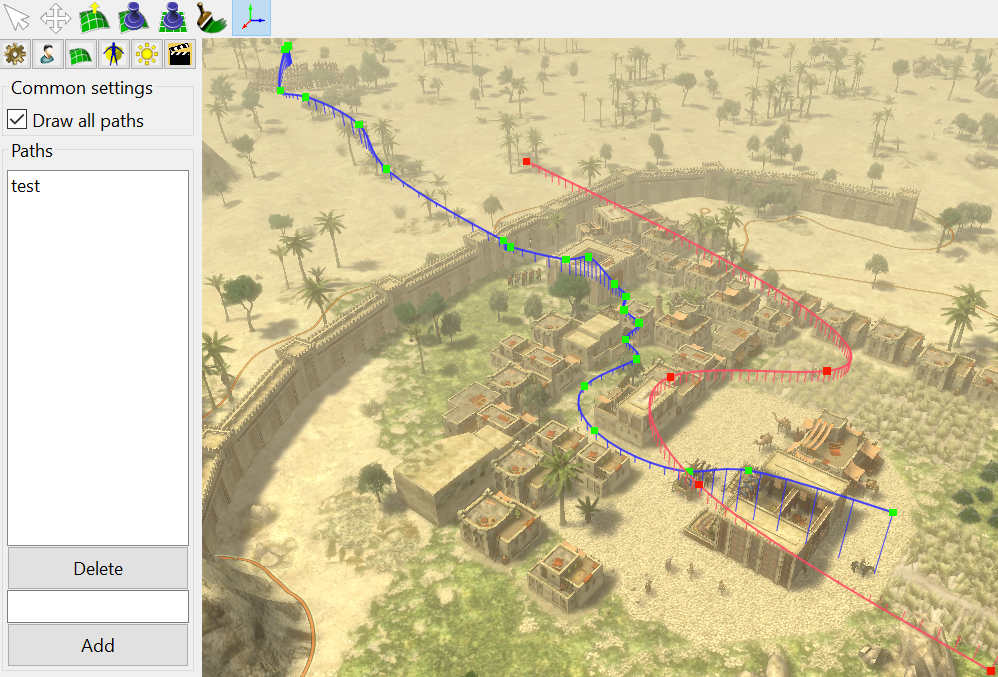
Displaying the track is useful for figuring out how your track is really moving. To draw the currently selected path only, check the "draw current" box. This will render the current path blue. If you want to draw the whole track, check "draw all" (or whatever it is). This will render the whole track blue. If both are selected, the current path is drawn red and the rest is drawn blue. Lines are best to use for inspecting/viewing the shape and direction of the path. Points are useful to see how fast the camera is moving at that point. The farther apart the points are, the faster the camera is moving. The rotation display determines how the path rotation is displayed: in relative terms or absolute terms. If in relative terms, it will display how much this path rotates relative to the previous path's rotation. Otherwise, it will show the path's rotation relative to no rotation at all, or in other words the accumulation of the start rotation and all the path rotations.
Troubleshooting
Sometimes when you try to play or move the track, you'll just end up seeing blue. This probably means that you either have a node with an unfilled time value, a Node0 has a time value besides 0, or your rotation is causing your to view into the endless blue. Solving the first and second are easy: just look through the nodes and find one without a time value. The last is also simple: change the rotation through the spin controls, use the mouse to rotate back to the map, and hit "mod path."
Attachments (8)
- cinematics_tab.png (16.2 KB ) - added by 7 years ago.
- cinematics_path_save.png (2.1 KB ) - added by 7 years ago.
- cinematics_path_new.png (498.0 KB ) - added by 7 years ago.
- cinematics_step_0.png (383.1 KB ) - added by 7 years ago.
- cinematics_step_1.png (418.8 KB ) - added by 7 years ago.
- cinematics_step_2.png (595.8 KB ) - added by 7 years ago.
- cinematics_tool.png (17.6 KB ) - added by 7 years ago.
- cinematics_demo.png (1.1 MB ) - added by 7 years ago.