
| Version 1 (modified by , 12 years ago) ( diff ) |
|---|
0 A.D. basic 3D implementation guide
In this guide we will be using Blender to create the 3D model, GIMP for textures, and Notepad++ for basic coding. All three of these programs are free and opensource, although other programs may be used to achieve similar results. You must also have an Alpha release of 0 A.D. installed on your computer. (SVN versions can also be used)
To keep things simple, we are going to create a simple crate.
Actor file setup
Lets begin by creating an 'actor' xml file that will link our 3D model with the texture file and crucially make them visible in Atlas (0 A.D.'s Map/Scenario Editor).
- Navigate to the 'mods' folder in the game's installation directory: binaries\data\mods
- In the mods folder you will have a 'public.zip' file that needs to be extracted into a folder also called 'public' within the 'mods' folder.
- Once the public zip is extracted, navigate to the following folder: binaries\data\mods\public\art\actors\props\special\eyecandy
- Make a duplicate of the actor file called 'crate_a.xml' and call it 'crate_test.xml'
- Open the 'crate_test.xml' file in Notepad ++ (or any code editor). You will see this:

- We need to change the file locations for 'mesh' and 'texture' to these:
<mesh>props/wrld_crate_test.dae</mesh>
<texture>props/crate_test.png</texture>
- Save the file (as 'crate_test.xml') and close Notepad ++
Texture creation
Here we will create a basic texture file so that we can skin it onto our model later.
- First thing we need to do is find a texture we can use for 0 A.D. Remember our textures are released as CC-BY-SA, so the texture you use must be compatible for it to be released. One of the websites we use is burningwell.org which has many public domain images. Search for 'wood' and I found this texture
- Download the texture and open it in Gimp. Most of our texture files are square, so we're going to crop the texture and resize it to be 128x128 pixels
- Save PNG file called 'crate_test.png'
- Move PNG file to the following location: binaries\data\mods\public\art\textures\skins\props
3D modeling
Here we will go through the basic requirements of creating a textured (UV Mapped) model and exporting it as a Collada DAE format 3D file
- Open Blender
- Select cube
- UV Map cube
- Export as DAE
- Move the DAE file to the following location: binaries\data\mods\public\art\meshes\props
Viewing model in Atlas
After saving the actor file, creating the texture, and exporting the 3D model, we can now open 0 A.D.'s Atlas Editor to view the crate in-game
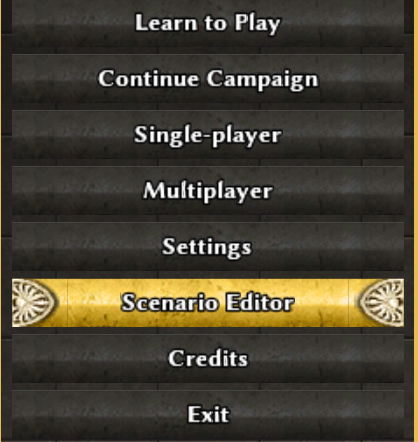
- Run 0 A.D. and in the menu select Tools & Options > Scenario Editor
- Open Atlas
- In the Actors(all) list find props\special\eyecandy\crate_test.xml
Attachments (16)
-
atlasfinal.gif
(14.4 KB
) - added by 7 years ago.
Final result
- textureopened.gif (20.5 KB ) - added by 7 years ago.
- texturescale.gif (5.5 KB ) - added by 7 years ago.
- texturecanvas.gif (19.3 KB ) - added by 7 years ago.
- blenderstart.gif (1.7 KB ) - added by 7 years ago.
- blendereditmode.gif (7.0 KB ) - added by 7 years ago.
- blenderuvunwrap.gif (18.6 KB ) - added by 7 years ago.
- blenderexport.gif (18.8 KB ) - added by 7 years ago.
- blenderselectedonly.gif (2.0 KB ) - added by 7 years ago.
- blendersave.gif (4.2 KB ) - added by 7 years ago.
- scenarioeditor.gif (26.2 KB ) - added by 7 years ago.
- atlasobject.gif (5.3 KB ) - added by 7 years ago.
- atlasactorsallt.gif (2.7 KB ) - added by 7 years ago.
- atlasfilter.gif (4.4 KB ) - added by 7 years ago.
- atlasactorviewer.gif (3.4 KB ) - added by 7 years ago.
-
ScenarioEditorMenuLocation.png
(199.9 KB
) - added by 2 months ago.
The new location of the link to the Scenario Editor in the main menu of 0 A.D.
Download all attachments as: .zip