
| Version 44 (modified by , 13 years ago) ( diff ) |
|---|
Table of Contents
Atlas (Scenario Editor) User's Guide
For a few tips and tricks which doesn't fit in this guide please see Atlas_Tricks
This guide is currently undergoing reorganization and might be a bit outdated, have information in more than one place etc. Will be fixed asap.
Starting Atlas & The basic tools
The Map tab
The Player Settings tab
The Terrain tab
The Object tab
The Environment tab
The Tabs
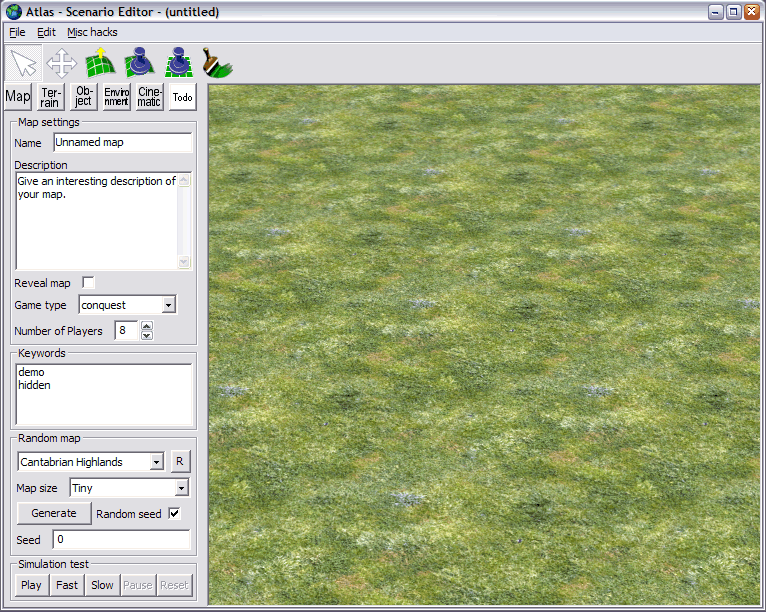
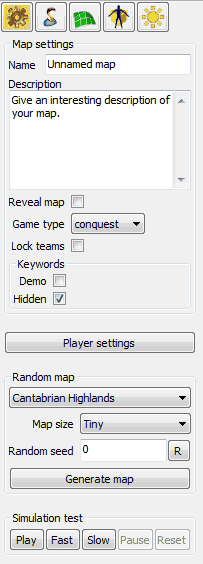
Map Tab

The contents of the Map Tab
Map settings
Map Name: Enter the name of your map to be displayed in-game. Currently only ASCII characters are available, but that will most likely be changed later so map names can contain other characters as well.
Map Description: Enter a description of your map. Again, only ASCII characters.
Reveal Map: This checkbox toggles whether or not the map will be revealed at the start of the game. If checked the map will be seen from the start, if not the player will have to explore to find the enemy, what the map looks like, resources etc. It will turn on/off both Fog-of-War and Shroud-of-Darkness, but if there's interest there may be separate settings for those eventually.
Game Type: This dropdown lets you select between different game types. Currently there's only Conquest (where you need to kill/destroy all your enemy's units and buildings) and Endless which is more suited for sandbox scenarios and requires the player to quit manually.
Lock Teams: If checked the players cannot change their team/alliances in the middle of a game, if unchecked they can. (Though not yet as diplomacy isn't implemented, but if you want to stop players from changing teams in the middle of a game once diplomacy is implemented it's a good idea to check this setting already and it should work once it is implemented.)'
Keywords
Demo: Makes the map show up among the "Demo" games in the game setup.
Hidden: Hides the map from showing up in the in-game lists of maps.
Player settings
Shortcut to go to the Player Settings tab.
Random Map
The dropdown menu allows you to select between the different existing random maps. See the Random Map Generator documentation for more info on how to write your own random map scripts.
Map size: The dropdown menu allows you to choose a size from Tiny (suitable for quick 1 vs 1 games) to Giant (enough room for 8 players and with space to expand).
Random seed: To generate the random map what's called a "random seed" is used. In other words, whenever the script needs to "make a choice" it does it based on this number. This means that as long as the number is the same the map will look the same even if you press the generate button several times (as long as you haven't changed any other settings of course), but by only changing this number the map will look slightly different. The position of trees, rocks, cliffs might be different etc.
R button: Refreshes the list of random maps so new random maps shows up.
Generate map: Click to generate a new random map with the above settings (as well as the player settings on the Player tab).
Simulation/Testing the map
On the last row we've got the Simulation test buttons. When you start a simulation with the start button the map “becomes alive”. There are waves in the water and units starts to attack nearby enemies, and the in-game GUI is displayed. To hide the in-game GUI press the G key. That's of course very much like starting a game, but the difference is that while you're in Atlas you can do everything you normally can in Atlas, but while running the game. That's very good when you want to test how units react to each other or changes in the environment. You can move units around, add new units, change height of different parts of the terrain, etc. Except for the changes to units the new changes remain when you reset the simulation.
The buttons are fairly self-explanatory, but for completeness sake here is a list of the buttons and what they do:
- The Play button – starts the simulation
- The Fast button – makes the simulation run fast
- The Slow button – makes the simulation run slow
- The Pause button – pauses the simulation
- The Reset button – resets the units to the position they were in before the simulation started
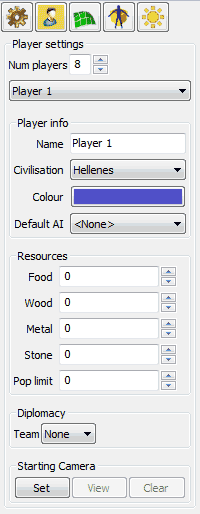
Player tab

Note: Player here refers to the "gameplay player", i.e. units and buildings belongs to a certain "player", rather than an individual who is playing the game.
Number of players: Set the number of players on the map. From one to eight (Not including Gaia).
Player selection dropdown: Click to select the player you want to edit, the settings below the dropdown updates depending on the player.
Player info
Name: Enter the name you want to display for this player. The player name is different from the user name (either entered at game start for multi player or automatically from the user name of your account on your computer) and will either be displayed alongside it or, in most cases, only be used if there is no username specified. For example for the AI.
Civilisation: Set the civilisation for this player. As of Alpha 7 all civilisations except for Romans and Persians have been fully included and can be used for all kinds of scenarios, Romans and Persians should not be used if you want to use the generate random map feature however.
Colour: Set a colour to be used for this player. Will appear on the units/buildings, on the minimap, for the borders of territories. Clicking the colour will bring up a colour picker (its looks depends on your operating system). Virtually all colours are available, but you should generally choose colours which are different from each other to avoid confusion.
Default AI: Set the AI to be used by default for this player. It's still possible to change it in the setup screen, and it currently doesn't have any effect on human players (eventually setting an AI here might allow a human and an AI to control the same player).
Resources
Allows you to set the resources that will be given to this player at the beginning of the game. The maximum is 2147483647, but it's not really recommended to go that high unless you want to set the number as high as possible for testing. If nothing is set the default values are used. If one or more is set that one will use the value set, but the other values will be set to the defaults.
Terrain Tab

The tool and (some of the) options of the terrain tab
The modify and flatten tools have already been talked about (though the Modify was then called the Alter terrain tool, but that name is a bit too long for that button, so thus it's Modify), so here we'll focus on the Paint terrain tool. All are however affected by the brush options and while we'll use the paint tool to explain them the other tools react in the same way to most of the options. But first we'll show you the terrains, as you won't notice any difference if we'd use the same terrain that's already there to explain the other options.
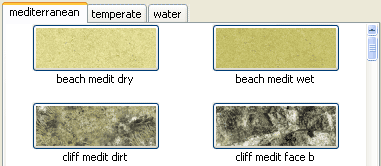
The terrains

The terrains
After clicking on the Paint terrain tool, either on the Terrain tab or from the tool bar (take a look at the tool bar to see whether it's selected as using the buttons on the Terrain tab sometimes doesn't work as well as it should), you need to select a terrain. To select a terrain is as simple as clicking on its image and then it's just to start painting.
Texture priority
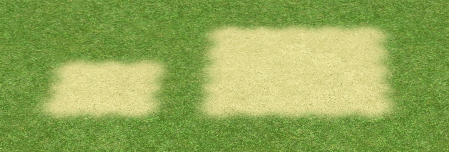
When painting terrain you can get different results by either clicking and dragging with the left or the right mouse button. The left mouse button allows you to paint in a more “dominant” style, while the right allows you to paint in a more submissive style. That might be hard to grasp when explained with words, but the picture below will allow you to understand it more easily, and you'll quickly get a grasp of it when playing around in Atlas yourself.

Two patches of a sand texture on the default grass texture, both painted with the default size 4 brush, but the left in “dominant” left mouse button mode and the right in “submissive” right mouse button mode
As you can see you get a much smaller piece of texture using the submissive mode, and that's useful when you want to paint in smaller parts of a texture on other textures.


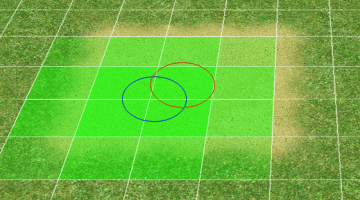
The difference between the circle and square brush shapes, displayed as more or less transparent tiles
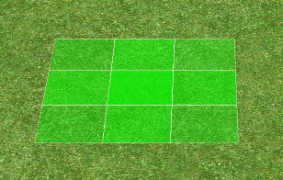
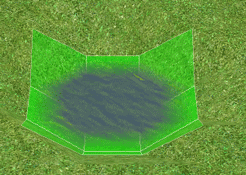
Brush options: Shape
To give the user more flexibility in using these tools there is a choice between either a circle or square shaped brush. Both are displayed as square grids, but while the circle brush gives a smoother outline the square brush is sharper. Even at large sizes the circle brush gives a somewhat squarey look due to the fact that the terrain is based on square tiles and thus every tool that is applied has to affect these tiles and nothing else.
Brush options: Size
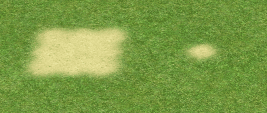
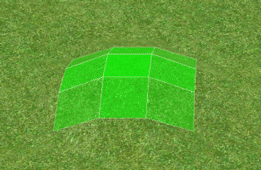
The size is pretty straight forward, increase the number and the size of the displayed grid, and the resulting effect of the brush, increases, and vice versa. Here the Paint terrain tool is a bit different though, as the area below the grid doesn't exactly equal the area affected, the end result is dependent on other things too, as the shape and texture priority settings also affect the final size of what gets painted. You can change the sixe both by writing directly into the text field or by clicking the up/down arrows on the right side of the text field.
Brush options: Strength
The strength option is a bit different in that it doesn't affect the Paint terrain tool at all.
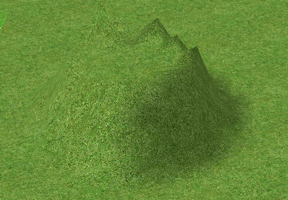
The other two terrain tools (the Alter terrain tool, and the Flatten terrain tool) are affected however. The greater the strength the greater the effect, i.e. if the value is 1 you'll have to hold the mouse button for some time before seeing any result, but if the value is 100 you only have to keep the button pressed for a small amount of time before a lot happens. You can change the value both by writing directly into the text field or by clicking the up/down arrows on the right side of the text field.
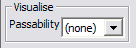
Visualise
 The Visualise:Passability dropdown menu lets you choose how and if you want to preview terrain passability (whether or not a unit can walk, sail, etc over that part of terrain). The options are
- None (No passability visualisation)
- Default (Visualises passability for land units)
- Ships (Visualises passability for ships)
Object Tab

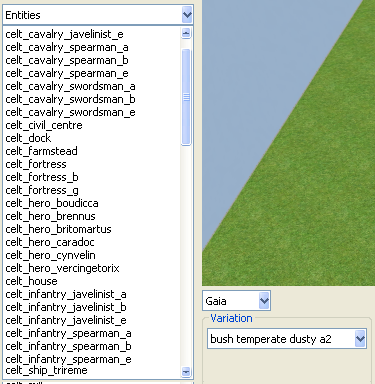
The contents of the Object tab
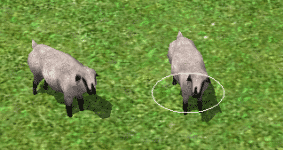
The object tab is where you can add objects onto the map. Objects can be everything from houses to units, from animals to trees. While there are a lot of objects, and for some of them a number of variations too, there isn't that much that need to be explained. The objects in the list to the left may be chosen by left clicking on them and then to place them on the map just move the mouse pointer there and left click to place it. Most objects can be rotated while placed, just click-and-hold the left mouse button where you want to place the object, move it around until you've found the rotation you're looking for. Don't worry if you don't get it right though, it's very easy to rotate the objects after you've placed them (see the Move/Rotate tool above).
Player selector
Allows you to choose which player the unit/building belongs to. You can also switch player by pressing the corresponding number key: 1-8 for normal players and 0 for Gaya.
Variations
Some objects have variations you can choose from. You can do that after placing the object by selecting it using the Move/Rotate tool and then choosing between the different options in the dropdown button.
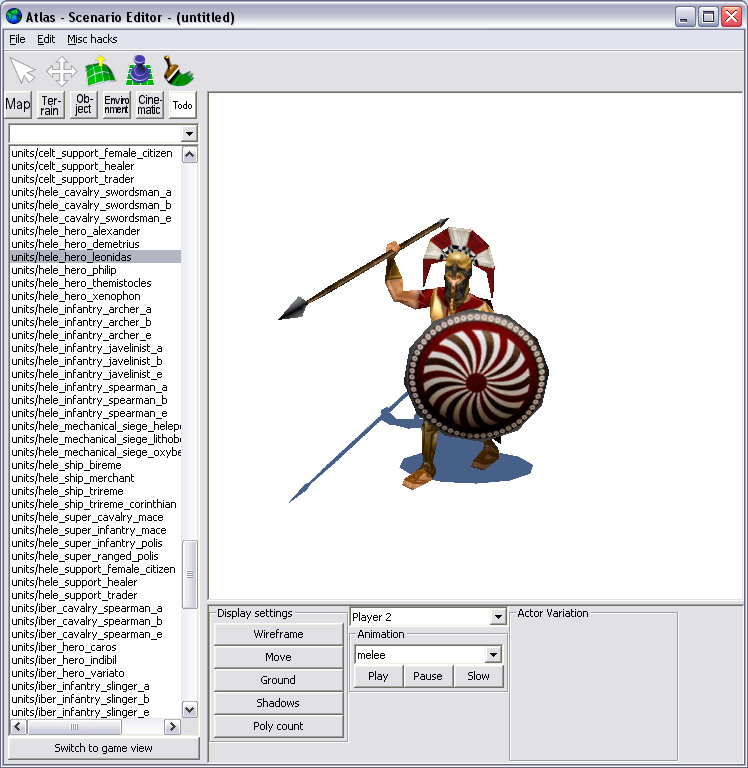
The Actor Viewer

The Actor Viewer is handy if you are editing a model and want to get some useful info and preview the model in different ways. It is launched by clicking the Switch to Actor Viewer button which can be found below the objects list.

In the area where the map is displayed when in game view you see a preview of the object (actor) selected in the list to the left. Below the object list is the "Switch to game view" button which takes you back to the normal game view (Please note that some settings changed in the Actor Viewer carries over to the Game View, i.e. Wireframe and Polycount).
Preview window mouse controls
Left mouse button The left mouse button controls zoom, press and hold it and move the mouse forward to zoom closer to the object and backward to zoom farther away.
Right mouse button The right mouse button controls rotation, press and hold to rotate, moving the mouse forward-backward rotates up and down while moving left-right rotates right-left.
Mouse wheel Scrolling with the mouse wheel zooms in-out.
Keyboard adjustments You can control all these mouse controls by using different keyboards adjustments. Pressing the Ctrl key while doing any of the above makes the effect smaller, i.e. you have to move the mouse further to get the same amount of rotation/zoom etc as without the key pressed. The Shift key does the opposite allowing you to get more done with less effort, and pressing both keys at the same time gives you the finest control.
Wireframe
Pressing this button allows you to toggle between displaying the object as a wireframe and displaying it as a solid model with the in-game texture.
Move
This button toggles how the movement of units is displayed when playing an animation. The default is that the unit stays in the same place on the screen while the animation plays, but you can get the unit moving forward in relation the screen by this toggle.
Ground
Toggles the display of a ground plane.
Shadows
Toggles shadows off and on.
Poly count
Toggles the display of renderer statistics. (Note that this shows the total number of polygons rendered, including the ground and shadows, not just the number of polygons in the mesh.)
Player selector
Allows you to choose which player the unit/building belongs to. Can among other things be useful to determine whether the different player colors looks good on your model. You can also switch player by pressing the corresponding number key: 1-8 for normal players and 0 for Gaia. (Currently only works when the preview window is in focus, but should work even in other cases eventually.)
Animation
The dropdown allows you to choose between the different animations for an object. And the buttons below allows you to: Play the animation, Pause the playback, and Slow plays the animation at 10 percent of the normal speed. Currently the list displays all possible animation types in the game though, and all objects doesn't have all animations, so that's why you might not see any effect from changing the animation. (Buildings, flora doesn't have any animations at all at the moment, and only citizen soldiers have the different gather animations. Among other things, but it's generally fairly easy to guess what objects have what animations, and if nothing else you can test by choosing an animation and press play.)
Environment Tab
The different buttons and sliders etc you can find on the Environment tab are really best learned when playing with them, as they affect things as the lighting (for example the location of the “sun” of the 3D world) and how the water reacts to light etc. Below will follow a short list with the different buttons etc and a short explanation on what they do. (Please make sure you have fancywater set to true - see http://trac.wildfiregames.com/wiki/Playing0AD#GraphicsSettings if you want to see the effects of the below settings.)
- Water height – changes how high the water level is, the further to the right the slider is, the higher the water
- Water shinines – changes how shiny the water is, the further to the left the slider is the shinier the water
- Water waviness – changes how wavy the water is, the further to the right the slider is, the more waves
- Water murkiness – changes how murky/clear the water is, the further to the right the slider is the murkier the water is, the further to the left the clearer the water is
- Water colour – changes the color of the water. Other settings may affect what color the water seems to be too, and in general this value is not something one wants to change
- Water tint – changes the color of the murkiness, and can be used together with the Water murkiness slider to simulate a muddy river for example
- Reflection tint – changes the color of the reflection tint
- Reflection tint strength – changes how much the reflection tint color is applied instead of the reflected objects/terrain/sky, the further to the left the slider is the less Reflection tint and vice versa
- Sun rotation – changes the position of the sun around the world
- Sun elevation – changes the height of the sun
- Sun overbrightness – makes it possible to make the sun brighter than otherwise would have been possible. The further to the right the slider is, the brighter the sun
- The shaded sphere is just a more visual way to interactively edit the Sun rotation and elevation
- Skyset – is where you can change the look of the sky in the game. This is useful for getting a specific look to the water as the sky is the primary thing reflected by the water in the game (as in real life)
- Sun color – changes the color of the sun (the light in the 3D world) which together with the terrain ambient is the way to control how much shadows there are + which colors shadows are
- Terrain ambient – the ambient is the “background lighting” ie how light/dark those parts of the map which are not affected directly by the sun are, this button allows us to control the color of that lighting (and thus also how bright/dark they are depending on how light/dark the color we choose is).
- Object ambient – same as the above, but for objects
Attachments (31)
- brush_options_circle_terrain.png (44.0 KB ) - added by 16 years ago.
- brush_options_square.png (13.5 KB ) - added by 16 years ago.
- brush_submissive_dominant.png (20.5 KB ) - added by 16 years ago.
- default_tool.png (627 bytes ) - added by 16 years ago.
- different_centers.png (36.3 KB ) - added by 16 years ago.
- different_centers2.png (45.3 KB ) - added by 16 years ago.
- different_centers_sub.png (46.1 KB ) - added by 16 years ago.
- tabs_cinematic_reset_camera.png (658 bytes ) - added by 16 years ago.
- tabs_object.png (83.2 KB ) - added by 16 years ago.
- tabs_terrain.png (1.9 KB ) - added by 16 years ago.
- tabs_terrain_terrains.png (12.3 KB ) - added by 16 years ago.
- tools_alter_terrain.png (813 bytes ) - added by 16 years ago.
- tools_alter_terrain_area_of_influence.png (30.5 KB ) - added by 16 years ago.
- tools_alter_terrain_lowered.png (25.5 KB ) - added by 16 years ago.
- tools_alter_terrain_raised.png (27.9 KB ) - added by 16 years ago.
- tools_flatten.png (840 bytes ) - added by 16 years ago.
- tools_flatten_after.png (38.1 KB ) - added by 16 years ago.
- tools_flatten_before.png (32.3 KB ) - added by 16 years ago.
- tools_move_rotate.png (611 bytes ) - added by 16 years ago.
- tools_move_rotate_sel_unsel.png (26.0 KB ) - added by 16 years ago.
- tools_paint_terrain.png (777 bytes ) - added by 16 years ago.
- switch_to_actor_viewer.png (453 bytes ) - added by 14 years ago.
- actor_viewer.jpg (180.8 KB ) - added by 14 years ago.
- visualize_passability.png (720 bytes ) - added by 14 years ago.
- start.png (109.8 KB ) - added by 14 years ago.
- tools.png (2.4 KB ) - added by 14 years ago.
- smoothen_flatten_elevation.png (1.2 KB ) - added by 14 years ago.
- 01_start.png (199.1 KB ) - added by 13 years ago.
- start.jpg (191.9 KB ) - added by 13 years ago.
- tabs_map.png (7.2 KB ) - added by 13 years ago.
- tabs_player.png (6.3 KB ) - added by 13 years ago.
Download all attachments as: .zip