0 A.D. Basic Model Importing Guide
Table of Contents
In this tutorial we are going to create a simple, non-animated, textured crate/box object to demonstrate the process of importing a basic model into 0 A.D. This example can be extended to work with more complex models and animated objects.
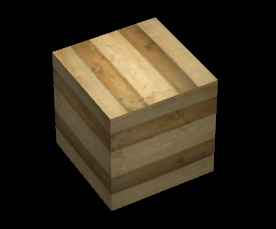
Your final result will look something like this:
Requirements
This guide specifically uses the following free, open-source software:
- Blender - to create the 3D model and UV mapping. Any version should work but the layout described on this tutorial is from version 2.6x. Other 3D modelling software supporting DAE/COLLADA export might work, too.
- GIMP - to create the model's texture. Again any version will work but this tutorial uses 2.8.x. Other image editing software will work, the main feature required is saving PNG images.
- Notepad++ - to edit the actor file. Notepad++ is available on Windows, but almost any decent text editor will do, the most helpful feature is code syntax highlighting.
You must also have an Alpha release of 0 A.D. installed on your computer, or you can use the SVN development version.
Actor file setup
Lets begin by creating an actor XML file that will link our 3D model with the texture file and crucially make them visible in Atlas (0 A.D.'s Map/Scenario Editor). Note: this process can also be accomplished with the the GUI-based actor editor tool.
- STEP 1 - Navigate to the 'mods' folder in the game's installation directory:
binaries\data\mods(see mod layout for details)
- STEP 2 - In the mods folder you will have a 'public.zip' file that needs to be extracted into a folder also called 'public' within the 'mods' folder.
- STEP 3 - Once the public zip is extracted, navigate to the following folder:
binaries\data\mods\public\art\actors\props\special\eyecandy
- STEP 4 - Make a duplicate of the actor file called 'crate_a.xml' and call it 'crate_test.xml'
- STEP 5 - Open the 'crate_test.xml' file in Notepad ++ (or any code editor). You will see this:
<?xml version="1.0" encoding="UTF-8"?>
<actor version="1">
  <castshadow/>
  <group>
    <variant frequency="100" name="Base">
      <mesh>props/wrld_crate_a.dae</mesh>
      <textures>
        <texture file="props/celt_prop_1.dds" name="baseTex"/>
      </textures>
    </variant>
  </group>
  <material>default.xml</material>
</actor>
- STEP 6 - We need to change the file locations for the mesh and texture to these:
mesh:props/wrld_crate_test.dae
texture:props/crate_test.png
The code should now look like this:
<?xml version="1.0" encoding="UTF-8"?>
<actor version="1">
  <castshadow/>
  <group>
    <variant frequency="100" name="Base">
      <mesh>props/wrld_crate_test.dae</mesh>
      <textures>
        <texture file="props/crate_test.png" name="baseTex"/>
      </textures>
    </variant>
  </group>
  <material>default.xml</material>
</actor>
- STEP 7 - Save the file (as 'crate_test.xml') and close Notepad ++
Texture creation
Here we will create a basic texture file so that we can skin it onto our model later.
- STEP 1 - First thing we need to do is find a texture we can use for 0 A.D. Remember our textures are released as CC-BY-SA, so the texture you use must be compatible with this license if you are planning for it to be released officially with the game. One of the websites we use to source textures is burningwell.org which is an online library of public domain images. Searching burningwell.org for the keyword 'wood' I found this texture, which will work well for this quick example.
- STEP 2 - Download the texture and open it in Gimp.
- STEP 3 - Most of our texture files are square ( see here for more info ), so first we're going to crop the texture to make it square.
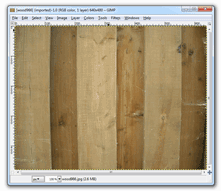
Open the texture file in Gimp by going to File > Open... and then selecting the image downloaded from burningwell.org. Once opened the editing window should look like this:
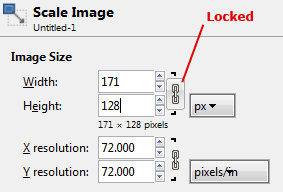
- STEP 4 - Now we are going to resize the texture so that it is 128x128 pixels. To do this, go to Image > Scale Image and change the Height value to 128 pixels. Make sure the Height and Width dimensions are locked (this changes the width value to 171px) like in the image below:
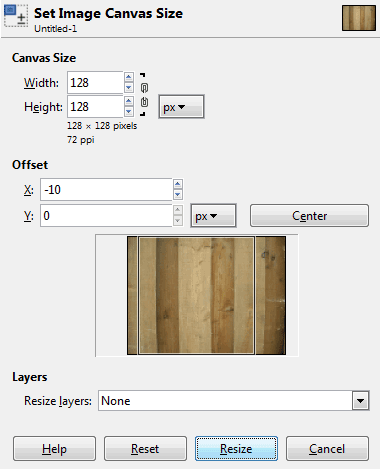
- STEP 5 - We're now going to edit the canvas to make the texture 128x128. Go to Image > Canvas Size... and there change the Width to 128px. The Offset can also be set similar to how I've done it below:
Select 'Resize' button to perform the resize to 128x128
- STEP 6 - Now we're going to save a PNG file called 'crate_test.png'. Go to File > Export... and select the 'PNG image (*.png)' fileformat in the dropdown. Make the Name 'crate_test.png' and then select 'Export' to save the file. Make a note of where you saved the file for the next step.
- STEP 7 - Move the PNG file to the following location:
binaries\data\mods\public\art\textures\skins\props(see mod layout for details)
3D modeling
Here we will go through the basic requirements of creating a textured (UV Mapped) model and exporting it as a Collada DAE format 3D file
- STEP 1 - Open Blender (the latest version of Blender is always recommended)
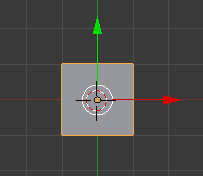
- STEP 2 - We're going to use the cube that appears by default in Blenders 3D View window:
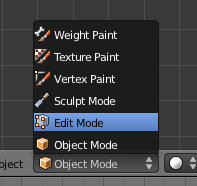
The first thing we're therefore going to do is change from 'Object Mode' to 'Edit Mode':
- STEP 3 - Once in edit mode go to Mesh > UV Unwrap... > Unwrap:
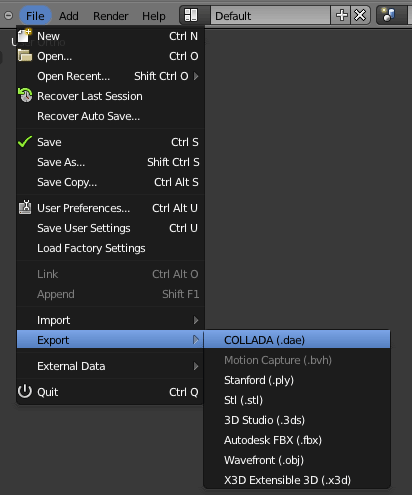
- STEP 4 - Surprisingly that's all we need to do in this very simple example. So now we can export the 3D model file by going back into 'Object Mode', selecting the cube, and going to File > Export > COLLADA (.dae):
- STEP 5 - In the export window that opens up, select 'Export only selected':
- STEP 6 - Change the filename to wrld_crate_test.dae and then click 'Export COLLADA':
- STEP 7 - Move the DAE file to the following location:
binaries\data\mods\public\art\meshes\props(see mod layout for details)
Viewing the model in Atlas
After saving the actor file, creating the texture, and exporting the 3D model, we can now open 0 A.D.'s Atlas Editor to view the crate in-game
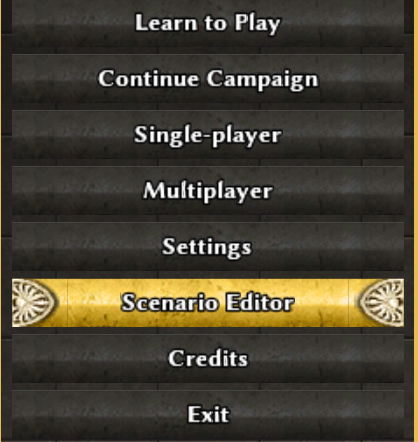
- STEP 1 - Run 0 A.D. and in the menu select Scenario Editor:
- STEP 2 - Select the Object tab:
- STEP 3 - Select Actors(All) in the dropdown to view actor objects instead of entities (that requires additional templating):
- STEP 4 - In the Filter field type 'crate_test' to find the actor file we created earlier:
- STEP 5 - Select the actor file in the list, and then click on 'Switch to Actor Viewer' to view the object in Actor Viewer:
- STEP 6 - The finished object should look like this in Actor Viewer:
Common Exporting Errors
See ExportingErrors
Attachments (16)
-
atlasfinal.gif
(14.4 KB
) - added by 7 years ago.
Final result
- textureopened.gif (20.5 KB ) - added by 7 years ago.
- texturescale.gif (5.5 KB ) - added by 7 years ago.
- texturecanvas.gif (19.3 KB ) - added by 7 years ago.
- blenderstart.gif (1.7 KB ) - added by 7 years ago.
- blendereditmode.gif (7.0 KB ) - added by 7 years ago.
- blenderuvunwrap.gif (18.6 KB ) - added by 7 years ago.
- blenderexport.gif (18.8 KB ) - added by 7 years ago.
- blenderselectedonly.gif (2.0 KB ) - added by 7 years ago.
- blendersave.gif (4.2 KB ) - added by 7 years ago.
- scenarioeditor.gif (26.2 KB ) - added by 7 years ago.
- atlasobject.gif (5.3 KB ) - added by 7 years ago.
- atlasactorsallt.gif (2.7 KB ) - added by 7 years ago.
- atlasfilter.gif (4.4 KB ) - added by 7 years ago.
- atlasactorviewer.gif (3.4 KB ) - added by 7 years ago.
-
ScenarioEditorMenuLocation.png
(199.9 KB
) - added by 2 months ago.
The new location of the link to the Scenario Editor in the main menu of 0 A.D.
Download all attachments as: .zip

